Key Takeaways
- Lift kits increase ground clearance, allow larger tyres, improve off-road performance, and give your vehicle a stronger, more aggressive look.
- Body lifts, suspension lifts, and levelling kits serve different goals, so the right choice depends on looks, performance, or a mix of both.
- Proper tools, a safe workspace, and careful preparation are essential for a smooth and secure lift kit installation.
- Wheel alignment, tyre fitment checks, and brake and steering inspections after installation help maintain safety and handling.
- Regular maintenance and professional installation extend lift kit life, ensure safety, and help protect warranty coverage.
The short answer on installation time: A basic body lift or leveling kit takes 2 to 4 hours for an experienced installer. A full suspension lift kit on a truck takes 4 to 8 hours, depending on the vehicle and lift height. For most truck owners, professional installation is the smarter choice, not just for safety, but because many lift kit warranties require it.
In case you ever wondered why you can sometimes see a truck or an SUV on the road with enormous tyres and a four-wheel look, then it is almost certain that it has a lift kit on it. But what is a lift kit, and why are so many off-roaders and vehicle owners so obsessed and in love with them? In simple terms, a lift kit is a kit employed to bring the vehicle up and offer it greater clearance on the ground, besides enhancing off-road handling capability and the capacity to have larger tyres.
Lift kits not only look good, but they also make your vehicle more approachable and departable in off-road scenarios, as well as raise the approach and departure angle, and can even increase towing and carrying capacity.
You might be just starting to think about going off-road, or you might just want to have a higher, domineering presence on the road, but regardless, the first step to making an informed upgrade is to understand truck lift kit installations and how to install a lift kit properly.
This blog will discuss the various kinds of lift kits, how they work, tools and preparations needed to install them, a step-by-step instruction on how to install Lift Kit them, and finally, a few tips that can help maintain your lifted car and keep it running at its optimum level. At the conclusion, you will have a full picture of a lift kit changing your ride both in style and performance.
Understanding Lift Kits: Types and Functionality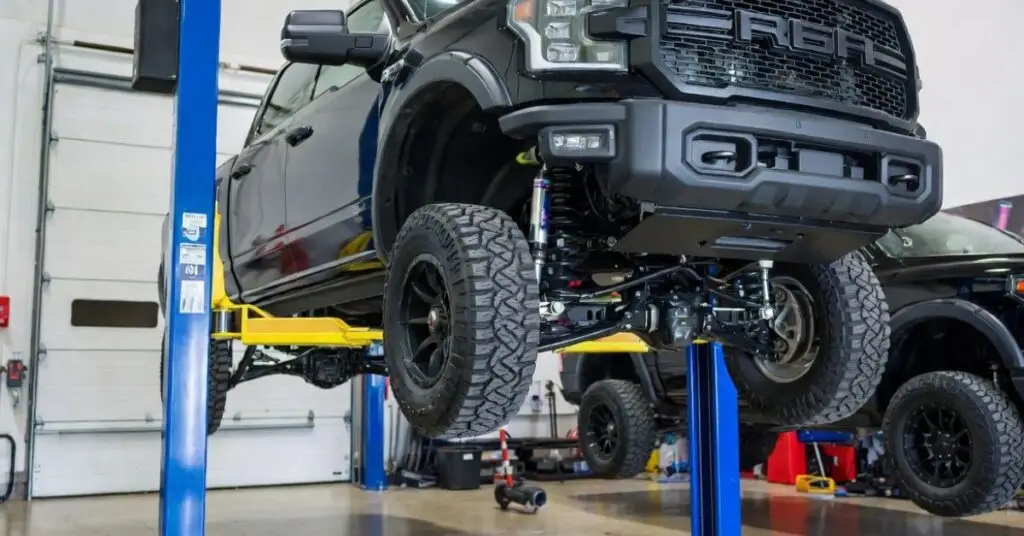
Lift kits are not merely a means of making your car appear larger, but actually change the way your car is used on the road in terms of handling, clearance, and performance overall. Lift kits will be of different types with various functionality depending on what you are interested in.
Body Lift Kits
Body lift kits are meant to lift the body of the vehicle up, but do not change the suspension. This provides additional room to fit bigger tyres and provides the vehicle with a high and macho appearance. Although mostly cosmetic, body lifts are also less complex and costly to install compared to suspension lifts. Yet, as they do not modify the suspension parts, they do not contribute to the great enhancement of off-road performance.
Suspension Lift Kits
Suspension lift kits are a major upgrade, and proper suspension lift kit installation is essential to ensure performance, safety, and durability of a vehicle, making the frame and the wheels elevated. This kind of raise fits best in off-roaders because it not only enhances the ground clearance but also the approach and departure angles, and can use larger tyres. One of the most common parts that are replaced to perform a suspension lift are coil springs, shocks, control arms, or any other suspension components. Such a kit not only alters the height of the vehicle but also improves its off-road handling and durability.
Leveling Kits
Naturally, many trucks are lower at the front to look raked. The lower part of the front of the car is made to appear like the back by levelling kits. The levelling kits, in most cases, do not elevate the level as high as the full suspension lifts, but they can provide the cars with a bit more space to add larger tyres and may also boost the appearance and performance.
How Lift Kits Work
Lift kits work by changing either the suspension geometry or the body-to-frame positioning of your vehicle and which one they change determines what kind of performance improvement you actually get.
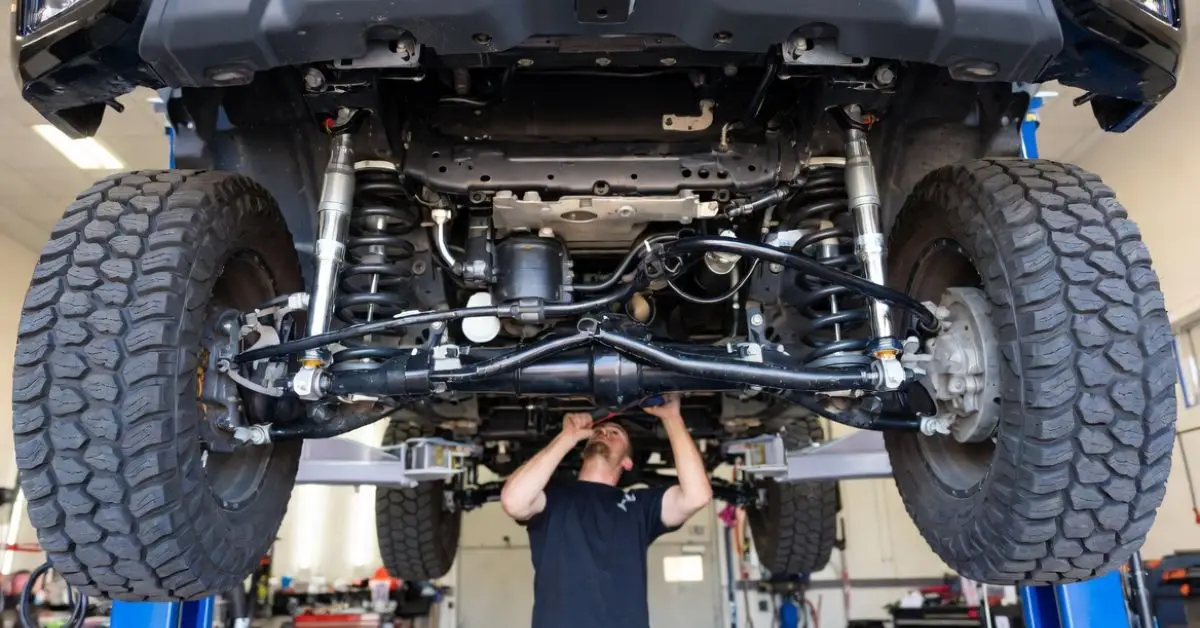
Suspension lift kits raise the frame and wheels together by replacing or extending suspension components coil springs, control arms, shocks, and related hardware. This increases the distance between your axles and the underside of your frame, which is your actual ground clearance. More ground clearance means more room to clear rocks, ruts, and obstacles without contacting your differential, skid plate, or frame rails. A 3-inch suspension lift, for example, raises your approach angle by several degrees the difference between clearing a boulder and getting stuck on one.
Body lift kits raise only the body off the frame using spacer blocks, without changing suspension geometry at all. Ground clearance doesn’t actually improve; only the body sits higher. The practical benefit is room for larger tires without rubbing on the fenders, plus a taller visual presence. Body lifts are simpler and less expensive, but don’t improve off-road performance the way suspension lifts do.
Leveling kits correct the factory front-to-rear rake; most trucks sit lower in front from the factory to compensate for towing loads. A leveling kit raises the front 1 to 2.5 inches to match the rear, allowing slightly larger front tires and a cleaner stance without the cost of a full lift.
One important mechanical reality, regardless of lift type: any change in ride height changes your suspension geometry, specifically camber, caster, and toe angles. This is why a professional wheel alignment is required after every lift kit installation, not optional.
Tools and Preparation Needed Before Installing a Lift Kit
Lift kits are one of the most exciting modifications that one can make to their car, and one needs to be very well-equipped to install the lift kit in a safe and efficient manner. You will first be required to acquire the right tools and exercise precautions before you begin your truck or SUV movement.
The Lift Kit Requires the Necessary Tools
The presence of the relevant tools improves the installation process, and the methodologies render it more secure. You possess the following, to which you are normally expected to require:
- Hydraulic Jack and Jack Stands: You would be required to place a support under your vehicle and lift it with a hydraulic jack and jack stands to make working under your vehicle safer.
- Socket and Wrench Set: To unscrew bolts and suspension parts.
- Torque Wrench: Tightens the bolts to the specifications of the manufacturer.
- Spring Compressors: This is required in order to install and remove coil springs on the suspension lifts safely.
- Screwdrivers and Pliers: They are nice for making slight modifications and removing clips.
- Hammer and Pry Bar: To loosen hard portions.
Before Installation Preparation Steps
With proper preparation, your truck lift install becomes safer, faster, and more efficient., time would be saved, mistakes would be avoided, and risks to safety would be reduced:
- Carefully read the Lift Kit Manual: Lift kits are a little different. It is much needed to perform in accordance with the instructions of the manufacturer.
- Level Surface: You must also have a flat and steady place where your car has been parked so as to eliminate accidents.
- Cleopatra of the Work Area: Clean up the work area by sweeping the loose materials or anything that may cause obstruction to the installation.
- Check the Kit Components: It is always important to check the components before the assembly to ensure that everything is there and in good shape.
- Lock the Car: The wheel chocks and jack stand should be employed to ensure that the car will not roll down during working hours.
Having these preparation steps in place and the right tools, you are now ready to have an easy time installing lift kit components safely and efficiently.. Not only is it a time-saving feature, but it is also a safety precaution, not just to the self but also to the car.
Step-by-Step Guide: How to Install a Lift Kit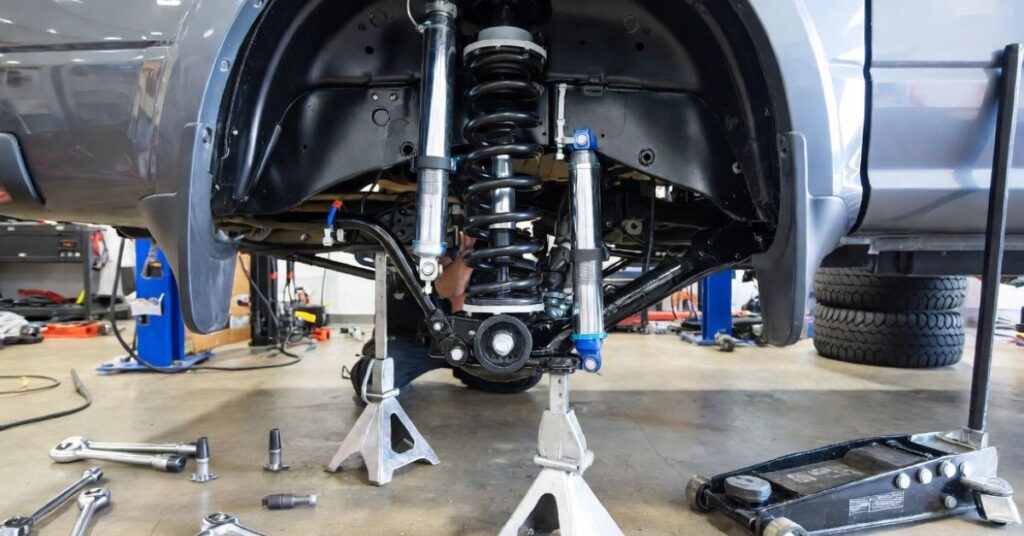
The steps below cover suspension lift kit installation the most common and complex type. Body lift and leveling kit installation follow a similar sequence but involve fewer components.
Step 1: Lift and Secure the Vehicle: Raise the truck with a hydraulic floor jack and place it on jack stands rated for your vehicle’s weight never work under a vehicle supported only by a jack. Use wheel chocks on the wheels remaining on the ground. Confirm the vehicle is stable on all four stands before getting underneath.
Step 2: Remove Wheels and Tires: Remove all four wheels to access the suspension components. Keep lug nuts organized and set wheels aside on a clean surface to avoid brake rotor contamination.
Step 3: Disconnect and Remove Factory Suspension Components: Working one corner at a time, disconnect the factory shocks, sway bar end links, and brake line brackets. On trucks with coil springs, use a spring compressor to safely remove the springs. Never remove a coil spring without compressing it first. Remove control arms if your kit requires replacement arms. Label every bolt and bracket as you go. Reassembly is significantly easier when nothing is guesswork.
Step 4: Install Lift Components: Install the new coil springs, spacers, or extended components included in your lift kit according to the manufacturer’s torque specifications. For suspension lifts, this typically includes: new coil springs or spacers, extended upper or lower control arms, new longer shocks, and any bump stop extensions. Do not final-torque bolts at this stage; leave them hand-tight until the vehicle is back on the ground and at ride height.
Step 5: Reinstall Shocks, Sway Bars, and Brake Lines: Bolt up the new shocks and reconnect sway bar end links. Re-route brake lines if needed extended brake line brackets are included in most quality lift kits and must be used to prevent line stretch. Confirm no brake lines are binding or under tension before proceeding.
Step 6: Reinstall Wheels and Lower the Vehicle: Reinstall wheels and hand-tighten lug nuts. Lower the vehicle off the jack stands and onto the ground. With the vehicle at ride height and suspension settled, final-torque all suspension bolts to manufacturer spec using a torque wrench. This step is critical and is one of the most common DIY errors when installers torque bolts while the suspension is still extended.
Step 7: Check Clearances: With the vehicle on the ground, check tire clearance at all four corners tires should not contact fenders, control arms, or brake lines at full steering lock. Check that brake lines, ABS sensor wires, and steering components are not stretched or binding.
Step 8: Test Drive and Re-Torque: Drive slowly for the first 50 to 100 miles on-road. After initial break-in, re-check all torque values, suspension components settle under load, and bolts can back off slightly. This re-torque step is often skipped but is a standard part of any professional installation.
Step 9: Get a Professional Wheel Alignment: This is not optional. Every lift kit installation changes camber, caster, and toe angles. Driving without alignment after a lift causes rapid, uneven tire wear and unpredictable handling. Schedule the alignment immediately after installation, before any significant mileage is put on the truck.
Post-Installation Checks: Alignments, Tire Fitment, and Safety
After the lift kit is installed, you cannot sit and enjoy the lift kit installed, but you have to undertake extensive post-installation testing to ensure that the lift kit is safe, is performing, and is long-lasting. Alteration in the geometry of your suspension can be achieved by lift kits, and this may affect alignment, tyre clearance, and handling. Here’s what to focus on:
The misalignment will increase the rate of tyre wear as well as affect the steering response in a negative way.
- Fitting of Tires: It is important to note that the new or old tyres should not be in contact with any of the fenders, suspension, or steering components. The bigger tyres might have to be clipped or cut so that they do not rub when turning or when the tyre is travelling over a suspension. Adequate balance of tyres should be ensured, and vibration should not occur on the road.
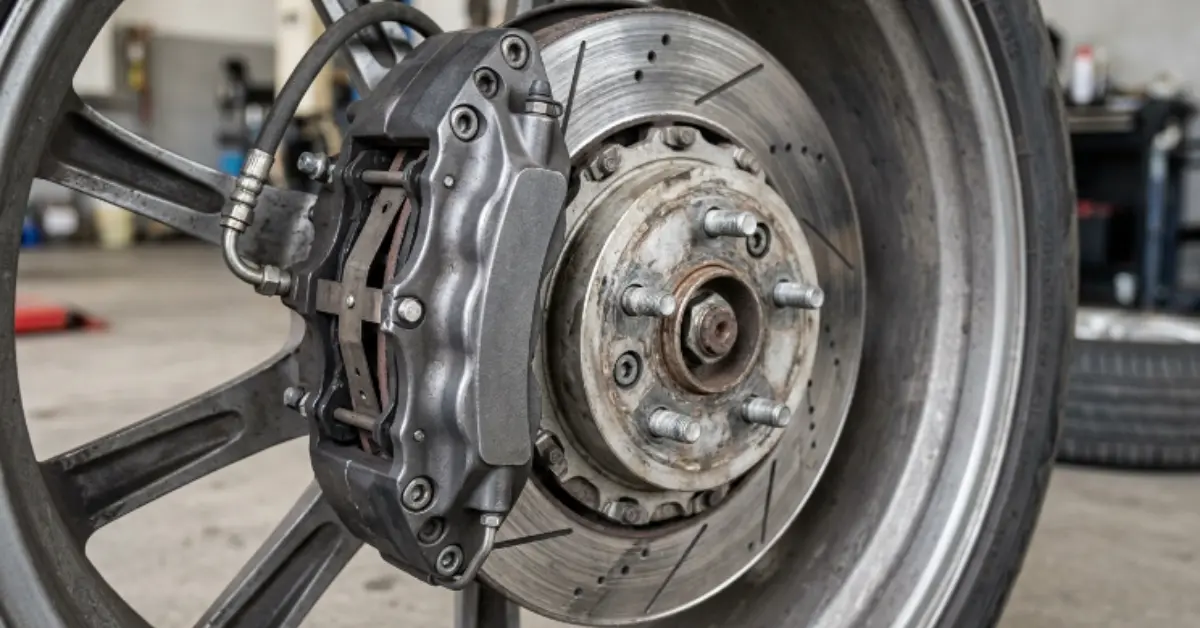
- Brake and Steering Check: Inspections of the components of the steering and brake lines, ABS, and steering components should be conducted to ensure that they are not stretched or strained. Ensure that there is a smooth running of steering. Check and inspection: Inspect the brake lines and suspension parts, and check them for leakage or loose fittings.
- Test Drive: This should begin with a slow test drive on a flat to trace the handling and performance. Listen to unusual sounds, vibrations, or scraping. Also, gradually accelerate, train turning, braking, and off-road.
- Alignment of the wheel: Lift kits can cause changes in the camber, caster, and toe. Get a professional wheel alignment to avoid irregular tyre wear and retain good handling.
These after-installation tests are imperative to ensure that your lifted car is safe, is doing well, and is not incurring expensive repairs. Periodic maintenance, particularly after the initial few drives, allows identification of any problem early enough.
Maintenance Tips to Keep Your Lifted Vehicle Performing Well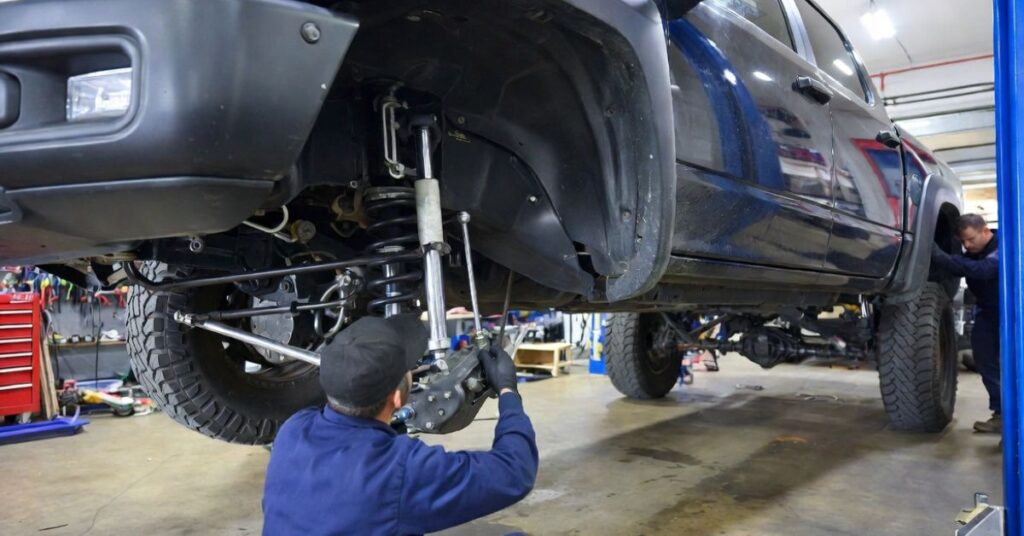
A lift kit will be able to change the way your car looks and performs on the road, yet it is important to take perfect care of it to be safe and run effectively. Raised vehicles impose an additional burden on the suspension, tyres, and steering systems, and therapy should be provided on a regular basis. To keep your ride up, here’s how:
- Periodic Suspension Inspections: Look at shocks, struts, springs, and bushings to see whether they are worn or damaged. Search for shocks and evidence of limp or torn springs. Install any loose bolts to ensure that they are not rattling and are also not hazardous.
- Observations on Watch Tire Conditions and Pressures: Larger tyres may require an increase or alteration of tyre pressure relative to stock tyres. Although suspension geometry and alignment change, change tyres occasionally to prevent uneven treads. Examine tyres to determine whether they contain any cuts, bulges, or non-standard wear patterns.
- Check the Wheel Alignment: Lifted cars have a higher chance of experiencing issues with wheel alignment. Establish a schedule of check alignment, especially after off-road drives or after colliding with obstacles.
- Oil Greased Suspension and Steering Components: Grease the joints, the bushes, and other moving components to lessen friction and decrease wear. Correct lubrication will enable easier handling and will also extend the service life of the component.
- Check Brake Lines and Steering Systems: Raised cars can place an additional burden on the brake and steering lines. Check the stretching, leaks, or damages and change the damaged parts as soon as they occur.
- Check Fasteners and Mounts: It is normal to check that the bolts and nuts are tight and that the mounts are in place after off-road use. Components can loosen due to vibrations and rough terrain.
With these maintenance tips, you are likely to have a number of years of enjoyment with your lifted vehicle without incurring a number of common problems that include uneven tyre wear, problems with handling, or even suspension breakdown. Even a small amount of regular maintenance can do wonders to maintain your lift kit in good working condition.
Why Professional Installation Makes All the Difference
Although it is tempting to install a lift kit on your own, a professionally installed lift kit service will provide safety and proper installation of your vehicle. Certified technicians possess the knowledge, expertise, and equipment to deal with the intricacies of suspension and body lifts, including the right amount of torque and setting the lift precisely where it needs to be. A professional like Gresham 4 Wheel Drive will be able to recognise possible problems which can not be seen by an amateur, like the tension of the brake lines, the steering geometry, or even the clearance problem, and make sure that your car will drive safely and reliably.
Also, a lot of lift kit manufacturers have warranties that are provided only with the help of professional installation. When you choose specialists, you save your money and simultaneously maximise the performance of your car. The appropriate lift height, tyre sizes, and suspension enhancements can be suggested by professionals and will provide you with a more comfortable ride, greater handling, and increased off-road performance. Simply stated, professional installation offers a sense of ease, security, and optimum performance of your lifted car.
Where to Get a Lift Kit Installed
If you’re looking for a shop to handle your lift kit installation, look for a specialist, not a general auto service chain. Lift kit installation on trucks and 4×4 vehicles requires technicians who understand suspension geometry changes specific to your vehicle, have experience with the lift brand you’re installing, and can perform the post-install wheel alignment in-house. General shops often outsource alignment or lack the equipment for heavy-duty trucks and modified suspensions.
At Gresham 4 Wheel Drive, we specialize in lift kit installation for trucks, Jeeps, and 4×4 vehicles across Gresham and the greater Portland, Oregon area. Every installation includes proper torque verification, post-install alignment, and full documentation, including records that support your lift kit warranty coverage.
📞 Call us at 503-400-7646 for a free lift kit installation estimate or stop by, and we’ll walk you through the right kit for your truck and driving needs.
Conclusion of How to Install Lift Kit
Finally, you know How To Install Lift Kit. Lift kits are a great solution to make your car look better, increase its off-road capabilities, and improve your performance in general. Their elevated body/suspension gives them more ground clearance, bigger tyres, and better off-road performance. To get the most out of your lifted car, it is important to be aware of the various kinds of lift kits, their proper installation, maintenance, and what should be done after the lift kit installation or truck lift kit installation process is completed.
Be it body lift, suspension lift, or levelling kit, appropriate installation procedures and maintenance measures will make it safe, durable, and work well. Professional installation service is always the best option for those who want to be at peace and be precise. You can take your vehicle on difficult trails and shine on the road with the right lift kit and care, and enjoy a smoother and more commanding driving experience.
FAQs
Q. Do I need a spring compressor for every type of lift kit installation?
No, spring compressors are only needed for suspension lifts that involve removing or replacing coil springs. Body lifts and leveling kits generally don’t require this tool since they don’t touch the coil spring setup. Always check your specific kit’s instructions to confirm which tools apply.
Q. How many miles should I drive before re-torquing bolts after a lift kit install?
It’s recommended to drive slowly for the first 50 to 100 miles after installation before re-checking torque values. Suspension components settle under load during this break-in period, and bolts can back off slightly. This re-torque step is often skipped but is essential for safety.
Q. Can a lift kit void my vehicle’s warranty?
It depends on the manufacturer and how the kit is installed. Many lift kit warranties specifically require professional installation to remain valid. Improper installation or skipping required steps like alignment can also affect coverage.
Q. Will a lift kit affect my truck’s towing or payload capacity?
Yes, lift kits can increase your truck’s towing and carrying capacity in some cases, depending on the kit and suspension upgrades. However, this varies significantly based on the specific components used and vehicle model. It’s best to check your lift kit’s specifications for exact capacity changes.
Q. Is it normal for a lifted truck to need more frequent maintenance than a stock vehicle?
Yes, lifted vehicles place extra stress on suspension, tires, and steering systems compared to stock trucks. This means more frequent inspections of shocks, bushings, alignment, and fasteners are necessary. Regular maintenance helps prevent uneven tire wear and premature component failure.